My Family Trii Assignment
http://www.miicharacters.com
3d font freak
| You will learn how to find various fonts and a 3d modeling program to design your name in your chosen font and make it look 3D. Assignment rules, requirements Each student will work on their own project, no groups or partners. This assignment you must: -Choose 3 fonts that shows your personality in different ways, download and use the fonts. -Design your name in 3D using Blender. -Render the 3d text and save the image to your folder. The assignment: The goal is to learn how to use a downloaded font, learn some basics in 3d modeling and along the way learn about fonts and how they show different personalities. Also we are learning how fonts help convey a certain mood, theme or emotion.
To Get Started... Finding and choosing your fonts: Step 1: Either of these websites has many fonts to choose from, look at lots before making a decision. Find one that fits your personality in a soft way, in a hard way and in a wild or wacky way. Fonts must be all filled in for best results, eroded or destroyed fonts wont look correct in 3D. You need 3 fonts, soft, hard, wacky. Step 2: Download the Windows font and then locate and go to the file. Step 3: Right click on the zipped file and then click extract here. Find all the font files usually extension .ttf and organize them into a fonts folder in your home folder. BY the end of DAY 1 you should have 3 .ttf files in a folder called fonts. DAY 2 Blender Beginnings: Step 1: Launch the program Blender, it is a graphics and editing program. Step 2: Click "View > Camera" shortcut is numpad 0 to change to camera view. *Try the other numpad buttons to see what they do to the view. Step 3: Click "Object > Delete" confirm deletion by clicking ok. Blender text: Step 1: Click add > text. Step 2: Click "Mode > edit mode" or by pressing the tab key, then backspace the word text and type your name. Step 3: Click the panels > editing button (it looks like a square with dots on the corners), then under the curve and surface options, extrude needs to be 0.10 or more, bevel if you want. Step 4: Load your font that you downloaded by clicking "load" under the font panel, then find the font and click "select font". **Finding it might be tricky use the "P" to go back in the folders and start at your username which would be the home folder, then the first initial of your first name, first initial of your last name, then your login. Blender text position and size: Step 1: Click "Mode > object mode" or by pressing tab. Step 2: Click "Object > Transform Properties" or by pressing the keyboard key N. Step 3: Change the settings by clicking on the numbers or typing new numbers of the properties of each axis for rotation, scale and location. Blender Color: Step 1: Click the panel "Shading" which looks like a circle/sphere or the keyboard shortcut F5. Step 2: Click "Add New" Step 3: Click the medium grey rectangle to the right of "Col" which is short for color, then choose the color you want, click outside of the color chooser to apply the new color. If you want to you can add "Ray Mirror" and pull the slider somewhere in the middle, this will make your text shiny. Blender Add Lamp: a lamp is light b/c right now your scene only has 1 light and usually it's in the back. Step 1: Click "Add > Lamp > Lamp". Step 2: Move the lamp away to the front from the text so that it can light up all the letters. Move either using the red, green and blue arrows or by using the Transform properties. You can and should also change your view to see where the light is in relation to the text. To change your view either click view and the view you want, or click the "MOUSE WHEEL" and move the mouse around. Blender Render: Render means in this context to give a copy of, or to represent or give a performance of. So to render is to tell the 3D computer modeling program that this is the finished product and to complete it as an artwork. Step 1: Setup the render settings: Click the panels button "Scene" (it looks like a moutain and sun) or press the keyboard key F10 to get to the render settings Step 2: Under Format change the image file type from JPEG to PNG, and click RGBA so that the background will be clear and not blue. Step 3: Click the large Render button, or press the keyboard key f12. Step 3.1: You can close the render if it looks how you want it, if not then move the light around, change the color or position to how you want. Step 4: Click file > save image, then choose your location to save it and click save PNG. Here are some example of completed renderings, guess which one is wacky, soft and hard.    When finished with ALL THREE, you can do it again for extra credit and instead of your name type your friends name, or moms name, or something else significant or fun to see in a cool font 3D. |
SAVE OFTEN, you don't want to lose all your work because you forgot to save every 5 minutes, quick save is shortcut key (ctrl+s) WHEN YOU NEED HELP ASK(raise your hand) but FIRST re-read the assignment guidelines.
Vector Valentine - Luscious Layers

| You will learn how to make a heart shape and then add depth and layers to make it pretty. The assignment: The goal of this assignment is to make a digital valentine with a vector art designing application called Inkscape, you will get some practice using a computer graphics program designing something from scratch. Furthermore it is a test on how well you as a student to become more independent and see if you can read and follow tutorials without the instructor holding your hand through each step. |
To get started launch the application Inkscape.(hint: click the Start button to launch applications)
Document Setup
Step 1: Click File > Document Properties
Step 2: Set Width 800px by Height 800px.
Step 3: Check "border ontop of drawing" Then close the document properties window.
Step 4: Click File > Save As - name the file valentine
Basic Heart Shape from Circle Steps
Step 1: Use this visual tutorial and follow through to make a heart shape.

Next duplicate (ctrl + d) or edit duplicate the heart shape and leave it in place but change the fill or stroke to various patterns, gradients, colors and set the opacity of the various layers so it looks good.
Have at least 4 layers,
1=pattern
1=linear gradient
1=color
1=second gradient, or second pattern, try radial gradient...

Layers What you Need to Know

Notes to remember - the more layers with duplicating shapes and adding gradients or patterns the more advanced and fancy it will look.
Adding text and putting it on a path steps
Step 1: Use this visual tutorial and follow through to make text on a path.

Once you are completed with your design and have all the requirements are met, you will need to export it as a bitmap.
Export as bitmap
Step 1: In Inkscape click File > Export Bitmap
Step 2: Click for export area "selection" for Bitmap size "90 dpi" (the width and height will follow) for filename "Browse and designate where you want the file and what you want it to be named. Then click Export.
Sending the image as an Email Attatchment
Step 1: Go to your email and compose an new email.
Step 2: Look for and then click the word or symbol attatchment(s). the symbol usually looks like a paperclip.
Step 3: browse for the image file name should be "valentine.png" unless you saved and exported it as something else.
OR
Sending the image as an Ecard.
Sending the image as an Ecard.
Step 1: Locate the exported .png file right click rename it to .jpg.
Step 2: Click on this link: http://www.regards.com/uploadimage.cfm
Step 3: Click "choose file" and locate your finished file.jpg.
Step 4: Follow the steps on the Regards.com website...
REMEMBER SAVE OFTEN, you don't want to lose all your work because you forgot to save every 5 minutes, quick save is shortcut key (ctrl+s) WHEN YOU NEED HELP ASK(raise your hand) but FIRST re-read the assignment guidelines.
Fav's Desktop Wallpaper
| You will learn how to make a fully customized desktop background on the linux computers (or Windows computers but you won't be able to set it as the background). Assignment rules, requirements Each student will work on their own project, no groups or partners. This assignment you must: -Design a colored desktop background in Inkscape. -Design multiple patterns and gradients to detail the background. -Download and embed 3 to 5 pictures of your favorite things. -Export the Inkscape file as a bitmap and set it as the background on the linux computers. The assignment: The goal is to learn how to follow steps in a process to achieve a goal on a computer, learn about visuals and how they are constructed, learn how to use multiple computer applications to achieve an overall completed project.
Basic Gradient background Steps Step 1: Launch the application Inkscape Step 2: Setup your File > Document Properties to Width 1024px by Height 768px. (Check border ontop of drawing). Step 3: Draw a large rectangle covering canvas. Step 4: Select the rectangle then click Edit > Duplicate. Step 5: Select the rectangle then click Object > Fill and Stroke. Step 6: Choose a darker or lighter color then on the Fill Tab click Linear Fill. Step 7: Click the Edit paths by nodes button (F2), and make the gradient from the top to the bottom.  Making & adding a strips pattern Steps: Step 1: Off to the side draw a rectangle. Step 2: Select the rectangle then click Edit > Duplicate (ctrl D). Step 3: Using the left or right arrow keys move the duplicated rectangle to the left or right. Step 3.1: Also for best results, on Fill and Stroke, the stroke tab click None. Step 4: Drag select both rectangles, or click on one rectangle then press and hold Shift and click on the second one. Step 5: Click Objects > Pattern > Objects to Pattern. - Now the pattern is made, next we need to use it. Step 6: Draw a large rectangle where you want your pattern (usually covering the entire background). Step 7: Select the rectangle then click Object > Fill and Stroke. Step 8: On the Fill tab click Pattern then select the pattern you made. Step 9: Rotate and resize the pattern in Edit paths by nodes button (F2). Pictures download and embedding steps coming soon. Today work on adding multiple patterns and layers of gradients.  How to Download a picture from the Internet in Steps: Step 1: In the browser find an image you would like to download, an easy place to start is Google Image Search. Step 2: Right click on the image to pull up the context menu Step 3: Click on "Save image as" Step 4: Designate where you want the image to be saved to, I usually put them on the desktop or in my folder, then click save. Importing images into Inkscape and manipulating them in Steps: Step 1: In Inkscape click File > Import Step 2: Locate the desired image you would like to import and then click open. Step 3: Using the "selection" tool move, resize, rotate the image as desired. To manipulate the image so that it looks better than just a square or rectangle you need to set a clip or mask for the image to have a new boundary. Step 1: Move the image to the side of the canvas so that you can edit it without the potentially of harming the rest of your design. Step 2: Create a shape over the image that will be it's new boundary, the shape could be a circle, square with rounded corners, star, polygon, etc. Step 3: Drag or shift click select both the picture and shape over of it. Step 4: Click Object > Clip > Set, or Object > Mask > Set. The difference between Clip and Mask is that clip only looks at the shape of the object whereas mask looks at some of the properties like the gradients / patterns / opacity also.  Once you are completed with your design and have all the requirements are met, you will need to EXPORT the file as a bitmap so that it can be set as the desktop wallpaper. Exporting the finished design as a bitmap and setting it as wallaper in steps. Step 1: In Inkscape click File > Export Bitmap Step 2: Click for export area "Page" for Bitmap size "90 dpi" (the width and height will follow) for filename "Browse and designate where you want the file and what you want it to be named. Then click Export. Step 3: Minimize Inkscape and all other programs that might be open, locate the bitmap image file you just created, open the picture into Image Viewer by double clicking on it. Step 4: Click on Image > Set as Wallpaper.  |
REMEMBER SAVE OFTEN, you don't want to lose all your work because you forgot to save every 5 minutes, quick save is shortcut key (ctrl+s) WHEN YOU NEEDHELP ASK(raise your hand) but FIRST re-read the assignment guidelines.
Typing
typingweb.com
Type for 1/2 hour, or one complete lesson non-beginner lesson.

Login using your own login that Mr. Hurst created for you:
login: firstname_lane
password: firstname
Example: jayden_lane
password: jayden
If you would like a different, more easy to remember, more secure, password let Mr. Hurst know and it will be so.
Type for 1/2 hour, or one complete lesson non-beginner lesson.
Login using your own login that Mr. Hurst created for you:
login: firstname_lane
password: firstname
Example: jayden_lane
password: jayden
If you would like a different, more easy to remember, more secure, password let Mr. Hurst know and it will be so.
Icon Redesign
You will learn how to redesign the desktop icons on this Fedora Linux operating system and set them as your own.
Assignment rules, requirements
Each student will work on their own project, no groups or partners.
This assignment you must:
-Have at least 4 redesigned icons.
1) Computer
2) Home folder
3) Finished projects
4) Mr. Hurst assignments link
-Icons should be at least 200px width by 200px height.
-Icons should represent in some regard the target in which they are linked.
The Grade - fill this out when you are done
The assignment: You are going to organize your desktop and add these folders / shortcuts. 1) Computer - links to the guts of the operating system, the root directories. 2) Home folder - your documents, also known in a windows op sys as "my documents" 3) Finished projects - you will create a new folder that will house the finished work to be archived and not accidentally deleted. 4) Internet - a visual shortcut that links to a homepage of your choice. The goal is to learn how computer icons work and how they just are a link or a shortcut to the application, they can look different and still link to the same thing. A secondary goal is to find out how well you can read and follow directions. How an icon works is it is a visual representation of the target application / folder / file that you are going to execute. It is supposed to symbolize where or what you are going to when you click it. ICON is the LINK to the TARGET.
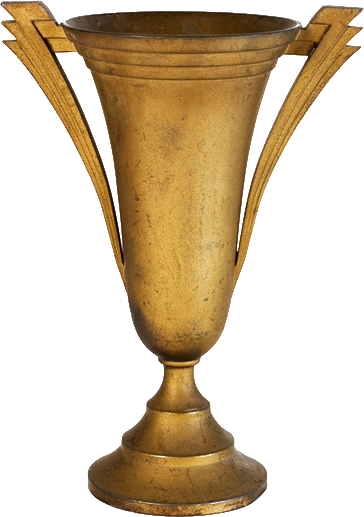
Getting started: learn how to set your first icon by changing the "computer" icon to this new icon. Step 2: Right click and save this image as.  Step 1: Open your home folder (should be your user login then home) then right click and create a new folder, title it "icons". Step 1: Open your home folder (should be your user login then home) then right click and create a new folder, title it "icons".this folder we will save all the picture files to when they are done so that you know not to delete or move these pictures because they are being used as icons. Step 3: Save it in the location that you just made in your home folder > icons. Step 4: Minimize all windows, right click on the "computer icon" click "properties" Step 5: click on the current icon and it will allow you to browse for the replacement icon, choose the computer.png file in the icons folder. NEXT, changing your home folder icon: Continue the same steps accordingly to download a PNG file type from the Internet of an icon that represents your home folder. Search on google for "my documents png" or "my documents icon" or "folder icons" "folder png" or any other mixture of words that mean similar things to find an image you like that is a PNG, if it is not a PNG you can open it in GIMP take the background away and then save it as a PNG. Other websites to find icons. *You may need to EXTRACT a zipped folder to get to the picture files, to do so once downloaded right click on the zip file and click "Extract Here".http://www.iconarchive.com/ Next, adding a new folder for finished work. Step 1: Right click on the desktop, click "create folder" - rename the folder, finished projects, or finished assignments, or completed, or done, or something that communicates the same meaning. Step 2: Set the image.png as the icon, see blue steps for help. This folder is supposed to be like a trophy room, or a portfolio, something that holds all the finished projects so you don't have to search through them on upcoming assignments. Consider the icon to be a trophy, or a portfolio, search google for a png that represents your idea of your finished work.
 Last, adding an Internet shortcut to Mr. Hurst's assignment page. Step 2: Drag the Firefox window to the right so you can see both the browser window and the desktop. Step 3: Locate the address bar, to the direct LEFT of the URL is a medium icon of the website, left click and drag this icon to the desktop which will create a shortcut to this website. Step 4: Rename to your liking, suggustions, "Internet" "Firefox" "Website name" "coolest awesome'est invention ever" -whatever makes sense to you, just take away the words "link to" Step 5: Right click and save this image as, download it to your icon folder, then set this picture as the icon. |


Subscribe to:
Posts (Atom)